http://lunaticswithlemonade.deviantart.com/
The group I cosplay in! Please visit our page!

Sunday 12 January 2014

Heart no Kuni cosplay

Because I forgot to do a post about MCM expo Oct 2013, I figured I do one about
Harrie, Harriet's and Bal's wonderful Heart no Kuni cosplay!

First off, we were all very excited to see Bal's Vivaldi dress
Her dress is gorgeous and she made every last bit herself from the ruffling round the edge to the string of sequins sewn around the hearts. The wig as well was immaculately styled by Bal too! 

Next up is Harriet, who had her cosplay commissioned by a local seamstress. 
There was a bit of a fiasco because the seamstress got ill a few weeks before Expo, so the dress was longer than it should have been! But luckily Lucy, Katie and Mollie managed to fix it up!
Harriet made such a cutie Alice! 

And the final piece to the group was Harrie as Blood!
So bishie it hurts!
She made a fabulous Blood. Her outfit was made using a plain suit. Then bias was all hand sewn on, along with cut out card suits to put on the bias. 


So here are some of the pictures from the shooting of the trio!

Off with his head

haha meow

Enchanté


Photo by Charley

Photo by Charley

Photo by Charley


Friday 13 September 2013

Cosplay Amour tutorial part 2

Wow so here's part 2 of the Armour tutorial!! Here we go.

 Now is the hardest and  most annoying part. Attaching your armour. I opted for poppers to give the armour a more 3D look. This meant getting Bal to mark on where each popper will join. I then had to sew all these poppers on the dress by hand WHICH IS VERY TEDIOUS. You can opt for velcrow, but it may not stick with heavy armour. If you're lucky, your armour may easily attach by just being tied on/you could glue it to a base.
 Now add poppers if you're connecting/putting on your armour that way. I used poppers as the armour
over laps so I didn't want it to look flat. The poppers raise the levels a little

This is what the muslin looks like wet

 Sealing the craft foam can take some time. I managed to do it during a week where I had nothing better to do all day. I mixed 3 parts pva with 2 parts water and painted it on. The less water the longer it'll take to dry. I just painted on a coat and went and did something else. It was usually dry after an hour or two. Depending on the amount of glue you add + how well you want it sealed then I'd reccommend 5 layers if you add lots of glue or up to 20 if you thin it out. Be careful as adding lots of glue at once means it's harder to control how much you seal it and you may end up with less flexible armour. It's essential for me that my armour bends as it curves around my waist, and even shaped in the oven a thick layer of glue will cause the craft foam to fold and not bend smoothly.
  Paint the underside if you feel it may be visible from certain angles. White muslin contrasting with your gold/silver/black etc armour is gonna look really weird.
 You are going to need a lot of paint if you're doing armour. I am also doing a lot of armour pieces so I went to a craft store and picked up a big tube on offer!
 As some of my craft foam was a different colour I had to paint it black. This isn't super necessary although I'd reccommend it if you have time. The thing to remember is to paint it in thin layers until the colour is what you want. I managed to paint it on thickly creating cracks in the acrylic as it dried. These however, can easily be painted over again to get rid of.
 Painting the armour is easy enough. I think it was the funnest part. I simply painted on red metallic acrylic, then painted on gold acrylic - mixing the two together as I did. Then I took a large paintbrush and almost 'stippled' on the black. If you want any two colours to mix/blend together then this should be done when wet. Mixing all 3 together gave the effect I wanted, which was a metallic dark gold/bronze.
 Many people weather the pieces with black acrylic. You can dab it on and smudge it with a sponge, fingers or anything really. Just be gentle. This armour doesn't really have many 'weathering points'. Most of the armour is flat. Embossing and dents look great when weathered.

 It may seem weird but floor wax is a good and cheap sealer. I used pledge, which I picked up from my local super market for £3.60 for a whole bottle. It's easy to use, dries quickly and doesn't ruin your paintbrushes! 
It depends what type of end look you want. Wax doesn't show up much, but if you are looking for a glossy finish then use some acrylic varnish which comes in satin, matte and glossy. A word of warning though, Acrylic varnish will ruin your paintbrush no matter what.
 I couldn't stress this last part enough! Make sure you test the wax doesn't strip away the acrylic
paint. That's why Multi-surface wax is the best. Don't forget to be gentle too. A soft paintbrush is ideal so you don't make any scratches.

Saturday 7 September 2013

Rikku wig styling tutorial

Well I'm not sure if you can call this a proper tutorial. More of a really detailed styling!
I filmed most of my styling so that if you are thinking about doing Rikku's wig, you can learn about some of the things that need to be done to the wig. 

Rikku's wig was really fun to style. I basically cut wefts from the second pony tail and braided them, sewed the braids together and pinned everything into place. It's not as hard as it looks unless you want it 100% accurate. 
Who knows how many braids or beads Rikku really has hidden under all that hair...


LwL's October progress!

Thought I should post LWL's progress for our October cosplays!!

Bal's Vivaldi progress:

I know she's cut out all the fabric, but what she has pics of is:


Her wig!
Dat beautiful crown

Fabric and pattern
I've seen her cut out all her fabric now. The skirt fabric alone weighs so much! Almost like big fat gypsy wedding at this rate; she's gonna need hip padding!! 


Charley is doing Nausicaa and Lettie from Howl's moving castle. So far she's only posted Lettie's progress pics, although I know she's done some of nausicaas!
Such a lovely shade of pink

many patterns and fabric @__@
Not sure what other Harrie is up to, but Harriet almost has all her Alice cosplay ready!
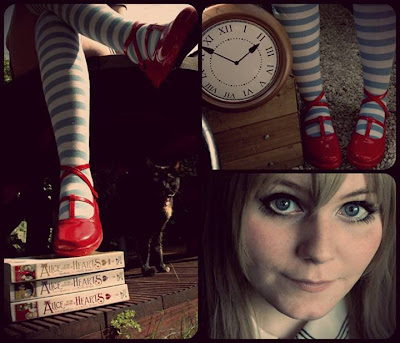
She is just waiting for the dress. Here is her wig, shoes and socks.

So I will post more progress as more gets done. Let's hope everyone finishes in time for MCM October Expo. Not sure if I will!!

Ciao 
xxx

Saturday 23 February 2013

50 shades of orange foundation

I remember a while ago pointing out that my sister's foundation was quite orange. I thought
it was because she wanted to look tan. But like her I've found that the palest skin tone in the shop is still just as orange as the darker colours. Both my sister and I have 'fair' skin and have to use palest foundation possible. But recently I've noticed something annoying.
I stopped buying foundation on the highstreet about a year ago simply because I thought that makeup companies purposefully made their foundations orange toned to suit girls who wanted skin that 'glowed'. I resorted to Korean BB cremes. They matched my skin tone. But recently I've realised this was not because they were pale to match the pale korean skin, but because they have grey undertones. 
A lot of customers have complained about BB cremes in general being too grey (probably because of the chosen chemicals in them) but it was something I never had a problem with.
And I found out why today.
I have pink undertones in my skin.
Doesn't sound like much but it makes all the difference when buying foundations. Most foundations on the highstreet suit women with yellow undertones in their skin and for them they do not get that orange tang on their skin even if they are pale. 
The grey undertones in the BB creme simply negated some of the pink in my skin and appeared less grey. 

But how can you tell what undertones you have?
Well surely everyone has a mix. You are not either pink, yellow or orange toned, or warm or cool specifically. But there are ways to tell which tones your skin has the most.
They say looking at your veins can determine this.
Image not mine!

Blue = cool (pink)
Green = warm (orange and yellow).
Blue/Green = olive
But if you're like me and have purpley/blue veins that seem to merge into massive green ones then there are easier ways to tell.

Pink toned:
- You blush easily 
- You burn easily
- You are more sceceptible to Acne Rosacae 
- You have blue coloured veins

Yellow Toned/Olive:
- You tan more easily than you burn
- You have green veins
- You have blue/green veins

As soon as I read about the 'you blush easily part' I knew straight away I probably had pink toned skin as I blush so easily. It is the only reason I wear foundation (yes I have lots acne scars but I hate the cakey feeling of skin makeup, I would rather just use concealer).
So why am I writing about this today? Well because if you are a cosplayer you'll long for that seamless foundation that matches your skin tone. So if you have found that every foundation you try is orange on your skin, then maybe you have more pink undertones and should aim for a foundation with a pinker tone. Mac's foundation come in both Cool (for Yellow tones: NC) and Warm (for Pink tones: NW) that come in all shades, and in the shops you can try the foundation that has the pinker tones in it. 
I hope this helped you!

x

Friday 4 January 2013

Cosplay armour tutorial part I


Bonjourno!
I figured as I was doing some armour for my next cosplay I'd do a tutorial so you don't make the same mistakes that I do and maybe if you are thinking of an armour cosplay you will have some idea of what you're up for. 

Okay, so I am going to cosplay Dark Knight Rikku:
Pic not mine

 Now it looks pretty complicated, and it was! I spent ages just trying to find reference pictures. Then I sketched out the armour and printed out refs. Also it turned out a second opinion was valuable as my friend spotted something I hadn't! 
So I decided to make this out of craft foam. Nice and cheap. But that is the cheapest item. Including the sword when finished the cosplay will be £50-£60. That's not including the wig (an extra £20). It's probably more expensive as I am having to buy resources to make the armour that I can use again afterwards but I don't already have them such as craft knifes, air dough etc. It has a lot of little things on it which add up unfortunately. But still, I spent £45 making/buying my last cosplay so it's not too bad, and apparently that's cheap too anyway for a cosplay. So, onto the tutorial part 1 where I'll show you how to make your pattern, cut out your armour and shape it if needed.

You will need:
  • 1-2 rolls of masking tape (depending on your cosplay you will need ALOT)
  • Scissors and if you want then a craft knife
  • Lots of paper --> scrap paper is great if you have it
  • Lots of sellotape! 
  • Material you are making your armour out of 
  •  A trusty sidekick friend (this is essential)
  • Thin clothing
  • An oven if shaping your armour and are using craft foam


1

1.) Okay so what you need to do is put on your thin clothing, but it needs to cover the area your armour will cover. Tie up long hair etc. This is where you need your trusty friend, I am very gratefull to have had Donnie help me with this! You'll need to get said friend to sellotape paper all over where your armour will be, and remember to stay as still as possible. This is where you start getting warm (you will get very warm, this took us 2 hours in total before I got the cocoon of paper and tape off my body and I was boiling by the end). Once you've acheived that you'll need your friend to get the masking tape, starting somewhere good and solid (I started at my rib cage) to wrap it tightly round and round to cover the paper. This is quite hard and you might want to stick your chest out to avoid restricting your breathing. So we did my torso first, then the chest, shoulders and then finally the top of my back.


2
2) Get your friend to draw the pattern you want (basically what you will want to be wearing) and then cut it out carefully. Whilst drawing your pattern you'll probably run into certain issues. These are: how you will get the armour on and off + will my material fit the pattern? I ended up making a line for a join to get the armour on and I also ended up having to separate the side bit from the top picture (as you can see it is pretty large and wouldn't fit my A3 craft foam). I will super glue it back on later (then it'll be sealed in by layers of pva glue, paint and polish so it'll be alright).Then you can either use this finished pattern to draw around or you can transfer it to tissue paper (don't forget to transfer markings i.e. joints, holes etc) as I did to check it all still fit when drawn out onto flat material. 


3
3.) Draw around your pattern onto the material you are making it out of. I'm using craft foam, but tissue paper doesn't absorb permanent felt tip pen which could be good if you need certain markings or bad if you don't want pen on your material! 


4

4.) Now you'll want to cut it out. I used a craft knife which cuts easily through the craft foam. You might need a different knife/pair of scissors to cut through your material, especially if it's thick. Remember to put a matt or board underneath so you don't scratch up any nice tables or granite work surfaces!


5
5.) Now if you need to shape it (if it's made out of craft foam) then you can heat it up. The oven is safest and you only need it on a low heat (I had ours at 50 C which is the lowest setting). It heats up pretty quickly and you can reheat it over and over, I didn't experience any shrinking or burning. But remember when you take it out you'll need to reshape it very quickly, and hold it there for at least 20 seconds until properly cooled. The foam is only warm as well when you take it out so don't worry about burning yourself (although if you have it up high then the foam may also be quite hot too so just be careful!). If you are using Worblas or wonderflex then these also bend when heated too, although a hot air gun is probably best for shaping Worblas.

And that's the end of part 1. As I've show how to make the pattern, cut and shape the armour I'll try upload part 2 sometime soon which'll be sealing and painting!

Monday 17 December 2012

Kagamine Rin Cosplay makeup tutorial

Thought I'd have a go at making a makeup tutorial. My camera is really old and bad qual, and then blogger killed the quality even more! Hopefully when I get a new camera in Jan I will make a nice tutorial if I have time :) Below is a tutorial for Kagamine Rin cosplay. I cosplayed her white magnet version (which is why her wig is different), but this is a basic cosplay makeup tutorial and you could use this for other female cosplays. I forgot to mention but I had already done my makeup base. It's not as rigorous as I would have done it; I'm not wearing concealer or Primer. I always wear primer when doing shoots/conventions because really it is great. One cosplayer described it as the 'butter you put on bread before your topping'. It really makes your makeup last and look better! 
Enjoy!


Products used:
BarryM black pencil eyeliner,
Coverbook eyeshadow pallette in champagne, light brown & dark brown,
Collection 2000 waterproof liquid eyeliner,
Eylure naturalite collection fake lashes (can't remember what pair),
Collection 2000 lengthening mascara

For general cosplay makeup brown eyeshadow is an essential. It is great for changing your eyes and it really makes them stand out. Also if you are like me and have un-symmetrical/a lazy eye then mascara/false lashes even them out.